13Vehicle Technology and Maintenance
Technische Bedingungen
Learn the technical requirements for vehicle safety that are tested on the German theory exam: tire specifications and minimum tread depth, braking systems (ABS, ESP), engine maintenance (oil, coolant), lighting systems, dashboard warning indicators, the mandatory TÜV/HU inspection cycle, and fundamental driving physics concepts.
Tires (Reifen)
Tires are the only point of contact between your vehicle and the road, making them the single most critical safety component on any vehicle. German law sets specific minimum requirements for tire condition, and the theory exam tests these in detail. The legal minimum tread depth for car tires is 1.6 millimeters across the central three-quarters of the tire width and around the entire circumference. However, the ADAC and tire manufacturers strongly recommend replacing summer tires at 3mm and winter tires at 4mm, because braking performance deteriorates significantly below these thresholds.
To check tread depth, you can use a tread depth gauge (available at any auto parts store for a few euros) or look at the tread wear indicators (TWI) built into every tire. These are small raised bars molded into the tread grooves at the 1.6mm level. When the tread surface is level with these bars, the tire has reached its legal minimum and must be replaced immediately. Many tires also have intermediate wear indicators at 3mm or 4mm.
Tire pressure is equally important for safety and is a common exam topic. Under-inflated tires increase fuel consumption, generate excessive heat (which can lead to blowouts at highway speeds), and reduce cornering stability. Over-inflated tires reduce the contact patch, decreasing grip, and make the vehicle more susceptible to road irregularities. The correct tire pressure for your vehicle is found on a sticker inside the driver's door frame or fuel filler cap, and in the owner's manual — not on the tire sidewall (which shows the maximum pressure, not the recommended pressure). Check tire pressure at least monthly and always when the tires are cold.
Tire age matters even when tread depth is adequate. Rubber compounds degrade over time due to UV exposure and ozone. Tires older than 6 years should be inspected carefully, and tires older than 10 years should be replaced regardless of tread depth. The DOT code on the tire sidewall shows the production date: the last four digits indicate the week and year (e.g., 2523 means week 25 of 2023). The exam may test your knowledge of where to find this information.
Snow chains (Schneeketten) may be required on certain Alpine roads and passes, indicated by sign 268. They must be fitted on the drive wheels and limit the maximum speed to 50 km/h. Practice fitting chains before you need them — doing it for the first time in freezing conditions by the roadside is extremely difficult.
Tips
- Use the 1 EUR coin test as a quick tread check: insert the coin into the tread groove. If you can see the gold rim of the coin (about 3mm), summer tires should be replaced. For winter tires, use a 2 EUR coin — if you see the silver rim (about 4mm), replace them.
- Always check tire pressure before long trips, especially before Autobahn driving. High-speed driving with incorrect pressure dramatically increases blowout risk.
- When replacing tires, always replace at least in pairs (both front or both rear) to maintain balanced grip. Ideally, the better tires should go on the rear axle, even on front-wheel-drive vehicles, to prevent oversteer in emergency situations.
Common Mistakes
- Checking tire pressure when the tires are warm (after driving). Heat increases pressure, giving a falsely high reading. Always check cold (vehicle stationary for at least 2 hours or driven less than 3 km).
- Using the maximum pressure printed on the tire sidewall as the target pressure. The correct pressure is specified by the vehicle manufacturer, not the tire manufacturer, and varies with load.
- Ignoring uneven tire wear patterns. Wear on one edge indicates alignment problems, center wear indicates over-inflation, and edge wear on both sides indicates under-inflation. These issues affect safety and should be corrected.
Braking Systems (Bremssysteme: ABS, ESP, and More)
Modern vehicles are equipped with multiple electronic braking and stability systems that work together to maintain vehicle control in emergency situations. Understanding what these systems do — and equally important, what they do not do — is essential knowledge for the theory exam and for safe driving.
ABS (Anti-lock Braking System / Antiblockiersystem) prevents the wheels from locking up during hard braking. When you brake hard without ABS, the wheels can lock and the tires slide across the road surface, resulting in loss of steering control and longer stopping distances (especially on wet or icy roads). With ABS, sensors detect when a wheel is about to lock and rapidly pulse the brake pressure to that wheel, allowing it to continue rotating just enough to maintain steering. When ABS activates, you feel a pulsing in the brake pedal and hear a clicking/grinding noise — this is normal. The critical driving instruction is: when ABS activates, maintain full brake pressure and steer. Do not pump the brake pedal (this was correct for cars without ABS, but counterproductive with ABS).
ABS allows you to steer during emergency braking — this is its primary advantage. Without ABS, locked wheels cannot transmit steering forces. However, ABS does not shorten stopping distances in all conditions. On loose gravel or deep snow, locked wheels actually create a wedge effect that can stop the vehicle faster than ABS-modulated braking. The exam may test this nuance.
ESP (Electronic Stability Program / Elektronisches Stabilitätsprogramm) goes beyond ABS by monitoring the vehicle's actual direction of travel against the driver's intended direction (based on steering wheel angle). If the vehicle begins to slide or spin (understeer or oversteer), ESP selectively brakes individual wheels and may reduce engine power to bring the vehicle back on course. ESP has been mandatory on all new vehicles sold in the EU since November 2014. While ESP significantly reduces the risk of loss-of-control accidents, it has physical limits — it cannot overcome the laws of physics if you are driving far too fast for the conditions.
Additional systems include: EBD (Electronic Brakeforce Distribution) which distributes braking force between front and rear wheels based on load; BAS (Brake Assist) which detects emergency braking situations by how quickly you press the pedal and applies maximum braking force faster than the driver can; and the parking brake (Feststellbremse), which must be engaged whenever the vehicle is parked, especially on slopes.
Tips
- If you feel ABS pulsing under your foot during braking, keep pressing the brake firmly and steer around the obstacle if needed. The system is working correctly. Do not release or pump the brake.
- Remember that ESP and ABS are aids, not magic. They extend the limits of vehicle control but cannot defy physics. A vehicle entering a curve at double the safe speed will crash regardless of electronic systems.
- Check that the ABS and ESP warning lights illuminate briefly when starting the engine and then go out. If either warning light stays on, the system is malfunctioning and must be inspected immediately.
Common Mistakes
- Pumping the brake pedal on a vehicle equipped with ABS. This was the correct technique for non-ABS vehicles but defeats the purpose of ABS and increases stopping distance.
- Assuming ESP makes the vehicle skid-proof. ESP reduces the risk but cannot compensate for excessive speed, bald tires, or extreme road conditions.
- Ignoring ABS or ESP warning lights on the dashboard. These indicate a system failure that eliminates a critical safety net. Have the vehicle inspected before driving further.
Engine Fluids and Maintenance (Motor und Wartung)
Proper vehicle maintenance is both a legal obligation and a safety requirement in Germany. While the theory exam does not expect you to be a mechanic, it tests basic knowledge about the fluids and components you must monitor, and what happens when they fail. Being able to check oil, coolant, brake fluid, and washer fluid is considered part of every driver's basic competence.
Engine oil lubricates the moving parts of the engine, reduces friction, carries away heat, and prevents corrosion. The oil level should be checked regularly (at least monthly and before long trips) using the dipstick. The engine must be off and the vehicle on level ground. Oil level should be between the minimum and maximum marks. If the oil level is below minimum, top up immediately with the correct specification oil (found in the owner's manual). The red oil warning light on the dashboard indicates dangerously low oil pressure — if this illuminates while driving, stop immediately and turn off the engine. Continuing to drive with no oil pressure will destroy the engine within minutes.
Coolant (Kühlmittel) circulates through the engine and radiator to maintain operating temperature (typically 85-105 degrees C). The coolant level should be checked when the engine is cold, using the transparent expansion tank. Never open the coolant cap when the engine is hot — the system is under pressure and boiling coolant will spray out, causing severe burns. The temperature warning light on the dashboard indicates engine overheating. If it illuminates, stop as soon as safely possible, turn off the engine, and wait for it to cool before investigating. Overheating can crack the engine block, resulting in catastrophic and expensive damage.
Brake fluid (Bremsflüssigkeit) transmits the force from your foot on the pedal to the brake calipers at the wheels. It is hygroscopic, meaning it absorbs moisture from the air over time. As moisture content increases, the boiling point decreases, which can cause brake fade (vapor lock) during heavy braking — the pedal goes soft and braking force is lost. Brake fluid must be replaced every two years as part of the regular maintenance schedule. The brake fluid level should be visible in the transparent reservoir under the hood.
Windshield washer fluid (Scheibenwaschflüssigkeit) must be kept topped up, especially in winter when road salt and spray constantly dirty the windshield. Running out of washer fluid on the Autobahn in winter can mean losing visibility within minutes as salt spray accumulates. In winter, use washer fluid with antifreeze protection appropriate for the expected temperatures.
Tips
- Learn where the five essential fluid checks are under your specific vehicle's hood: engine oil dipstick, coolant reservoir, brake fluid reservoir, power steering fluid (if applicable), and washer fluid reservoir.
- The most critical dashboard warning lights are red: oil pressure, engine temperature, battery, and brake system. If any red warning light comes on while driving, stop as soon as safely possible and investigate.
- Keep a small bottle of engine oil (the correct specification for your car) and washer fluid in the trunk for emergencies, especially on long trips.
Common Mistakes
- Opening the radiator or coolant reservoir cap while the engine is hot. The system is pressurized to about 1.5 bar, and boiling coolant will erupt, causing severe burns.
- Ignoring the red oil warning light and continuing to drive. The engine can seize within minutes without oil pressure, turning a minor problem into a multi-thousand-euro repair.
- Mixing different types of coolant (e.g., blue and pink/red). Different formulations can react chemically, forming sludge that clogs the cooling system. Always use the type specified for your vehicle.
Lighting Systems (Beleuchtung)
German law specifies exactly which lights a vehicle must have, when they must be used, and the penalties for non-functional lighting. The theory exam tests your knowledge of each light type, its purpose, and the rules governing its use. Driving with defective lights is not only a traffic violation but also a serious safety hazard.
Abblendlicht (dipped beam / low beam) is the standard headlight for driving. It must be used at night, in tunnels, when visibility is reduced by weather, and at any time when daylight is insufficient. Dipped beam illuminates approximately 50-60 meters ahead without blinding oncoming traffic. In Germany, unlike some other countries, daytime running lights (Tagfahrlicht) are not mandatory, but using dipped beam or DRLs during the day improves visibility and is recommended.
Fernlicht (high beam) provides full illumination of approximately 200 meters but must be switched off when oncoming traffic is approaching, when following another vehicle closely, in built-up areas with adequate lighting, and generally whenever it would blind other road users. Many modern vehicles have automatic high beam (Fernlichtassistent) that detects oncoming lights and switches automatically, but the driver remains responsible for correct light use.
Nebelscheinwerfer (front fog lights) may only be used when visibility is substantially reduced by fog, rain, or snowfall. They produce a wide, low beam that illuminates the road edges and is positioned below the normal headlights to reduce reflection off fog particles. Using front fog lights in clear conditions is a traffic violation because they can glare other drivers.
Nebelschlussleuchte (rear fog light) is the most strictly regulated light. It may only be activated when visibility drops below 50 meters. At that visibility, your maximum speed must be 50 km/h. Using the rear fog light in better conditions is prohibited because it blinds following drivers with an intensity similar to brake lights.
Additional lights include: Blinker/Fahrtrichtungsanzeiger (turn signals, must flash at 60-120 times per minute), Warnblinkanlage (hazard warning lights, used for breakdowns, approaching traffic jams, and towed vehicles), Standlicht (parking lights, for parked vehicles on unlit roads), Bremslichter (brake lights, activate automatically when braking), and Rückfahrscheinwerfer (reverse lights, activate automatically when reverse gear is engaged). All lights must be checked before every journey — a non-functional brake light, for example, is both illegal and extremely dangerous.
Tips
- Walk around your vehicle periodically and have someone press the brakes, turn signals, and lights while you check them from outside. A burned-out bulb is one of the most common and easily fixed defects.
- Memorize the dashboard symbols for each light: green for dipped beam, blue for high beam, green/yellow for fog lights, yellow/amber for rear fog light. If you see blue, check for oncoming traffic before you blind them.
- After replacing a headlight bulb, check the beam alignment. A misaligned headlight can blind oncoming drivers (too high) or fail to illuminate the road adequately (too low).
Common Mistakes
- Driving with only daytime running lights (Tagfahrlicht) at night or in fog, thinking they are sufficient. DRLs illuminate only the front — the rear of the vehicle remains completely dark and invisible to following traffic.
- Using front fog lights (Nebelscheinwerfer) in clear conditions for aesthetics or as extra light. This is a traffic violation (20-25 EUR fine) and causes unnecessary glare.
- Not knowing where the rear fog light switch is in your vehicle. In an emergency (sudden dense fog), fumbling for the switch wastes critical time. Familiarize yourself before you need it.
Dashboard Warnings and TÜV/HU Inspection
The dashboard instrument cluster communicates critical vehicle status information through warning lights and gauges. Understanding what these indicators mean is essential for safe driving and is tested on the theory exam. Warning lights follow a standardized color system across all manufacturers: red indicates danger or a critical malfunction requiring immediate attention, yellow/amber indicates a warning or system issue that needs attention soon, green indicates a system is active and operating normally, and blue is used specifically for high beam.
The most critical red warning lights include: the oil pressure warning (an oil can symbol — stop immediately, engine damage is imminent), the engine temperature warning (a thermometer in liquid — stop, the engine is overheating), the battery/charging warning (a battery symbol — the alternator may have failed; you have limited driving time before the battery dies), the brake system warning (an exclamation mark in a circle — may indicate low brake fluid, worn pads, or a hydraulic failure; do not drive until the cause is identified), and the airbag warning (may indicate a system fault that could prevent airbag deployment in a crash).
Yellow/amber warnings include: the check engine light (engine shape — indicates an emissions or engine management issue; have it diagnosed soon but immediate breakdown is not usually imminent), the ABS warning (may indicate ABS failure — normal braking still works but the anti-lock function is lost), the ESP/traction control warning (indicates the system is intervening, or if steady, that the system is malfunctioned), tire pressure monitoring (TPMS — indicates low pressure in one or more tires; stop and check or inflate), and the fuel warning (indicates approximately 50-80 km of range remaining depending on the vehicle).
The TÜV/HU (Hauptuntersuchung) is the mandatory vehicle safety inspection required every two years for passenger cars in Germany (every year for vehicles used commercially or after first registration older than certain thresholds). The HU is conducted by authorized inspection organizations (TÜV, DEKRA, GTÜ, KÜS) and checks roadworthiness: brakes, lights, steering, suspension, tires, exhaust emissions, structural integrity, and more. The result is documented by a colored sticker (Prüfplakette) on the rear license plate showing the month and year of the next inspection.
Driving with an expired HU is a traffic violation. If overdue by more than 2 months, the fine starts at 15 EUR. Over 4 months: 25 EUR. Over 8 months: 60 EUR and 1 point in Flensburg. Additionally, an overdue HU can affect insurance coverage — if an accident is caused by a defect that would have been caught in the inspection, the insurance company may reduce their payout. A new vehicle receives its first HU 3 years after first registration, then every 2 years thereafter.
Tips
- Memorize the meaning of red dashboard warning lights as a priority. If a red light comes on and you do not know what it means, stop safely and consult the owner's manual before driving further.
- Schedule your HU appointment before the expiration date shown on the rear plate sticker. Many workshops offer online booking. The inspection takes about 30-45 minutes and costs approximately 100-150 EUR.
- Keep a record of all maintenance performed on your vehicle. This documentation supports warranty claims, improves resale value, and helps you track when the next service is due.
Common Mistakes
- Ignoring a yellow check engine light because the car 'drives fine.' The issue may worsen over time, cause increased fuel consumption, or lead to a failed HU inspection.
- Confusing the TÜV/HU interval: new cars get their first inspection after 3 years, then every 2 years. Not every 3 years, and not annually (for standard passenger cars).
- Covering or obscuring the HU sticker on the license plate. Police can read the sticker from behind your vehicle and will pull you over if it shows an expired date.
Driving Physics (Fahrphysik)
Understanding basic driving physics is not merely academic — it directly affects how you drive and is tested on the theory exam. The key concepts are stopping distance, centrifugal force, friction, and the relationship between speed, mass, and kinetic energy.
Stopping distance (Anhalteweg) is the sum of reaction distance (Reaktionsweg) and braking distance (Bremsweg). The German formula taught in driving school is: reaction distance = (speed in km/h / 10) x 3 meters (assuming 1 second reaction time). Braking distance = (speed in km/h / 10) squared meters on dry road. So at 50 km/h: reaction distance = 15m, braking distance = 25m, total stopping distance = 40m. At 100 km/h: reaction distance = 30m, braking distance = 100m, total stopping distance = 130m. For emergency braking, halve the braking distance (better tires, maximum force): 50m at 100 km/h. On wet roads, double the normal braking distance.
The critical insight from these formulas is that braking distance increases with the square of speed. Doubling your speed quadruples the braking distance. Going from 50 to 100 km/h does not double the braking distance from 25 to 50 meters — it quadruples it from 25 to 100 meters. This is why speed is the dominant factor in accident severity and why even small speed reductions have large safety effects.
Centrifugal force (Fliehkraft) acts on a vehicle in curves, pushing it outward. It increases with the square of speed and is inversely proportional to the curve radius. This means that doubling your speed in a curve quadruples the centrifugal force. If you enter a curve too fast, centrifugal force can exceed the tire grip and the vehicle will slide outward (understeer in front-wheel-drive vehicles, oversteer in rear-wheel-drive). The correct technique is to reduce speed before entering the curve and maintain steady speed through it. Never brake hard in a curve — this shifts weight to the front axle, reducing rear grip and potentially causing a spin.
Kinetic energy (Bewegungsenergie) also increases with the square of speed. A vehicle at 100 km/h has four times the kinetic energy of the same vehicle at 50 km/h. In a collision, this energy must be absorbed by the vehicle structure, restraint systems, and occupants' bodies. This physical reality is why a collision at 70 km/h is not merely 40% worse than at 50 km/h — it is nearly twice as severe in terms of energy that must be dissipated.
Tips
- Memorize the stopping distance formulas: reaction distance = (speed/10) x 3, braking distance = (speed/10) squared. These appear directly in exam questions.
- When following another vehicle, use the 2-second rule as a minimum: pick a fixed point the vehicle ahead passes and count at least 2 seconds before you reach it. In rain, increase to 3-4 seconds. On ice, 5-6 seconds.
- When approaching a curve, reduce speed before the curve entry. The safe cornering speed is lower than most drivers think — listen to your tires. If they make a squealing sound, you are near the grip limit.
Common Mistakes
- Underestimating how dramatically braking distance increases with speed. Most drivers intuitively think it is proportional (double speed = double distance), but it is squared (double speed = quadruple distance).
- Braking hard in a curve instead of before it. Braking in a curve overloads the front tires (they must handle both braking and steering forces) and can cause loss of control.
- Assuming that a heavier vehicle is always safer. While mass helps in a collision with a lighter object, heavier vehicles require longer to stop and generate more centrifugal force in curves.
Key Rules
The legal minimum tire tread depth is 1.6mm, but the safety recommendation is 3mm for summer and 4mm for winter tires.
Why: Below these thresholds, the tire's ability to displace water and grip the road decreases dramatically. At 1.6mm, wet-road braking distance is up to 50% longer than with new tires.
Example: You check your summer tires and find 2.0mm of tread remaining. While technically legal, the ADAC recommendation is 3mm. You schedule a tire replacement before the next rainy season, especially since these tires will be used for Autobahn driving.
Penalty: Driving with tires below 1.6mm tread depth: 60 EUR and 1 point. If causing danger to others: 75 EUR and 1 point. If causing an accident: increased penalty and potential insurance reduction.
When ABS activates during emergency braking, maintain full pedal pressure and steer. Do not pump the brakes.
Why: ABS automatically pulses the brakes faster and more precisely than any human can. Pumping defeats the system and increases stopping distance. ABS preserves steering, which is its primary purpose.
Example: A child runs onto the road. You slam the brake pedal and feel pulsing under your foot. You keep pressing hard while steering around the child. ABS keeps the wheels from locking, allowing the steering input to take effect.
If the red oil pressure warning light comes on while driving, stop immediately and turn off the engine.
Why: The oil pressure light indicates that the engine's internal lubrication has failed. Metal components are grinding against each other. Continuing to drive for even 30 seconds can cause total engine destruction.
Example: You are driving on the Autobahn and the red oil can symbol illuminates. You immediately signal right, move to the hard shoulder, and turn off the engine. You call roadside assistance rather than risk driving to the next exit.
Penalty: No direct traffic fine, but continuing to drive can cause engine seizure (3,000-10,000 EUR repair) and may void insurance coverage if the vehicle subsequently causes an accident.
The TÜV/HU vehicle inspection is mandatory every 2 years. First inspection for new cars is after 3 years.
Why: Regular inspection catches safety-critical defects (worn brakes, faulty lights, structural corrosion) before they cause accidents. The system ensures a minimum roadworthiness standard across all vehicles.
Example: Your HU sticker shows expiry in month 06/2026. You book an appointment in May 2026 to ensure you are inspected before the deadline. The inspection finds a worn brake hose that you had not noticed, preventing a potential brake failure.
Penalty: HU overdue by 2-4 months: 15 EUR. 4-8 months: 25 EUR. Over 8 months: 60 EUR and 1 point in Flensburg.
Braking distance increases with the square of speed. Doubling speed quadruples braking distance.
Why: Kinetic energy is proportional to the square of velocity. The brakes must convert all kinetic energy into heat. Twice the speed means four times the energy to dissipate.
Example: At 50 km/h, your braking distance on dry road is 25 meters. At 100 km/h (double the speed), the braking distance is not 50 meters but 100 meters (4 times as far). At 130 km/h, it is 169 meters.
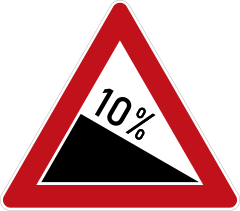
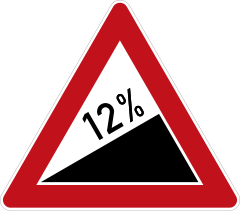
Related Traffic Signs
Video Resources
ABS, ESP, Reifenprofil — Fahrzeugtechnik für die Theorieprüfung
Explains the key vehicle technology concepts tested on the German theory exam: how ABS and ESP work, tire requirements, minimum tread depth, and what dashboard warning lights mean.
Bremsweg, Reaktionsweg, Anhalteweg — Fahrphysik einfach berechnen
Step-by-step guide to the stopping distance formulas (reaction distance, braking distance, total stopping distance), with examples at different speeds and road conditions.